Wednesday, March 30, 2011

Remove Node from 11g RAC Cluster:

Connect to the node being deleted (dbss8002) as root and execute the rootdelete.sh script to prepare it for the CRS removal.

/u01/app/root/product/11.1.0/crs/install/rootdelete.sh local nosharedvar nosharedhome

Remove CRS from dbss8002 (Update OCR):

From any of the remaining nodes other than the one that is being deleted,  execute the rootdeletenode.sh script as a root user to remove the node2-pub from the OCR.
You need node name as well as node number for the node that is being deleted. You can get this information by running olsnodes -n command line utility.

/u01/app/root/product/11.1.0/crs/install/rootdeletenode.sh <node to be deleted>,<node_numnber>

/u01/app/root/product/11.1.0/crs/install/rootdeletenode.sh dbss8002,2


Update the Inventory for CRS on the remaining Nodes:


Connect to any of the remaining nodes and execute the below command to update the inventory with the proper no.of Nodes in cluster for the CRS_HOME.
The inventory has alredy been updated for the DB_HOME as well as ASM_HOME. In my case, I connect to node1-pub and run below command.


export ORACLE_HOME=/u01/app/root/product/11.1.0/crs
echo $ORACLE_HOME
cd /u01/app/root/product/11.1.0/oui/bin
./runInstaller -ignoreSysPrereqs -updateNodeList ORACLE_HOME=$ORACLE_HOME CLUSTER_NODES=dbss8001  CRS=TRUE
 
Verify that the node is removed successfully:

Verify that the node has been removed successfully by looking at OCR through various command like olsnodes. Also, run the lsinventory to make sure that the Inventory does not know of the node that has been deleted. (in case of 2 or nore node RAC system).
Starting Oracle Universal Installer...

Checking swap space: must be greater than 500 MB.   Actual 3023 MB    Passed
Checking monitor: must be configured to display at least 256 colors
    >>> Could not execute auto check for display colors using command /usr/X11R6/bin/xdpyinfo. Check if the DISPLAY variable is set.    Failed <<<<

>>> Ignoring required pre-requisite failures. Continuing...

The inventory pointer is located at /etc/oraInst.loc
The inventory is located at /u01/app/oraInventory
'UpdateNodeList' was successful.


 dbss8001:/u01/app/root/product/11.1.0/crs/bin # ./crs_stat -t
Name           Type           Target    State     Host
------------------------------------------------------------
ora....01.lsnr application    ONLINE    ONLINE    dbss8001
ora....001.gsd application    ONLINE    ONLINE    dbss8001
ora....001.ons application    ONLINE    ONLINE    dbss8001
ora....001.vip application    ONLINE    ONLINE    dbss8001
ora.oradv1.db  application    ONLINE    ONLINE    dbss8001
ora....11.inst application    ONLINE    ONLINE    dbss8001


Tuesday, March 22, 2011

Steps to Upgrade 10.2.0.4 single instance with ASM storage to 11.2.0.2

In this article I will discuss how to upgrade an existing Single Instance 10.2.0.4 database with ASM, having different ORACLE_HOMES, to 11gR2 with ASM. The upgrade needs to be performed in two phases:


1. Upgrade the ASM instance
2. Upgrade the database
 
Upgrade ASM Instance: 
 
Using OUI of Grid Infrastructure

From 11gR2 onwards ASM is part of Grid Infrastructure and we need to download 
Grid Infrastructure software first from oracle website.
 
./runInstaller
Starting Oracle Universal Installer...

Checking Temp space: must be greater than 120 MB.   Actual 9900 MB    Passed
Checking swap space: must be greater than 150 MB.   Actual 4511 MB    Passed
Checking monitor: must be configured to display at least 256 colors.    Actual 16777216    Passed
Preparing to launch Oracle Universal Installer from /tmp/OraInstall2011-03-22_09
 
1. It will automatically defaults to the “Upgrade Mode”
 
Select “Upgrade Grid Infrastructure” and click Next.
2. On clicking Next, It will detect the already existing ASM instance. Shutdown the Database and ASM instance at this point.
3.  Enter a Password for ASMSNMP user. If the password is not met with oracle standards a “Red Cross” will be shown in the tab at left hand side. Do not worry about that cross
<oracle:+ASM>:/u01=>sudo /u01/app/root/product/11.2.0/grid/rootupgrade.sh
Running Oracle 11g root script...

The following environment variables are set as:
    ORACLE_OWNER= oracle
    ORACLE_HOME=  /u01/app/root/product/11.2.0/grid

Enter the full pathname of the local bin directory: [/usr/local/bin]:
The file "dbhome" already exists in /usr/local/bin.  Overwrite it? (y/n)
[n]:
The file "oraenv" already exists in /usr/local/bin.  Overwrite it? (y/n)
[n]:
The file "coraenv" already exists in /usr/local/bin.  Overwrite it? (y/n)
[n]:

Entries will be added to the /etc/oratab file as needed by
Database Configuration Assistant when a database is created
Finished running generic part of root script.
Now product-specific root actions will be performed.
Using configuration parameter file: /u01/app/root/product/11.2.0/grid/crs/install/crsconfig_params
Creating trace directory
LOCAL ADD MODE
Creating OCR keys for user 'oracle', privgrp 'oinstall'..
Operation successful.
CSS appears healthy
Stopping CSSD.
Shutting down CSS daemon.
Shutdown request successfully issued.
Shutdown has begun. The daemons should exit soon.
CRS-4664: Node oralab successfully pinned.
Adding daemon to inittab
ACFS-9300: ADVM/ACFS distribution files found.
ACFS-9307: Installing requested ADVM/ACFS software.
ACFS-9308: Loading installed ADVM/ACFS drivers.
ACFS-9321: Creating udev for ADVM/ACFS.
ACFS-9323: Creating module dependencies - this may take some time.
ACFS-9327: Verifying ADVM/ACFS devices.
ACFS-9309: ADVM/ACFS installation correctness verified.

oralab     2011/03/22 21:44:26     /u01/app/root/product/11.2.0/grid/cdata/oralab/backup_20110322_214426.olr
Successfully configured Oracle Grid Infrastructure for a Standalone Server
 
<oracle:oradv1>:/u01/grid=>export ORACLE_HOME=/u01/app/root/product/11.2.0/grid
<oracle:oradv1>:/u01/grid=>export ORACLE_SID=+ASM
<oracle:+ASM>:/u01/grid=>cd /u01/app/root/product/11.2.0/grid/bin
<oracle:+ASM>:/u01/app/root/product/11.2.0/grid/bin=>./sqlplus / as sysasm

SQL*Plus: Release 11.2.0.2.0 Production on Tue Mar 22 21:49:31 2011

Copyright (c) 1982, 2010, Oracle.  All rights reserved.


Connected to:
Oracle Database 11g Enterprise Edition Release 11.2.0.2.0 - 64bit Production
With the Automatic Storage Management option

After the upgrade I have checked /etc/oratab file and found the entry of ASM pointing to new home i.e now ASM is a part of “Grid Infrastructure”
 

/u01/grid=>cat /etc/oratab
“+ASM:/u01/11g/oracle/product/11.2.0/grid:N”


2. Upgrade the database
 
Install Datbase The Software:
 
Download Oracle Database 11gR2 software click Here . Execute runInstaller to install “SOFTWARE ONLY” option.

Step1:Run Pre-Upgrade Information tool
 I have installed the software under “/u01/11g/oracle/product/11.2.0.2/db_1″ location. Once the software is installed, then go to location $ORACLE_HOME/rdbms/admin and copy  utlu112i.sql script to /tmp/upgrade directory. Now login to 10g database “/ as sysdba” and startup the 10g database, then:

SQL> spool /tmp/dbupgrade/upgrade.spl
SQL> @/tmp/dbupgrade/utlu112i.sql
SQL> spool off

Following is the output of this script from my database:

Oracle Database 11.2 Pre-Upgrade Information Tool 03-22-2011 22:09:06
Script Version: 11.2.0.2.0 Build: 001
.
**********************************************************************
Database:
**********************************************************************
--> name:          ORADV1
--> version:       10.2.0.4.0
--> compatible:    10.2.0.4.0
--> blocksize:     8192
--> platform:      Linux x86 64-bit
--> timezone file: V4
.
**********************************************************************
Tablespaces: [make adjustments in the current environment]
**********************************************************************
--> SYSTEM tablespace is adequate for the upgrade.
.... minimum required size: 585 MB
--> UNDOTBS1 tablespace is adequate for the upgrade.
.... minimum required size: 23 MB
--> SYSAUX tablespace is adequate for the upgrade.
.... minimum required size: 226 MB
--> TEMP tablespace is adequate for the upgrade.
.... minimum required size: 61 MB
.
**********************************************************************
Flashback: OFF
**********************************************************************
**********************************************************************
Update Parameters: [Update Oracle Database 11.2 init.ora or spfile]
Note: Pre-upgrade tool was run on a lower version 64-bit database.
**********************************************************************
--> If Target Oracle is 32-Bit, refer here for Update Parameters:
WARNING: --> "sga_target" needs to be increased to at least 412 MB
.

--> If Target Oracle is 64-Bit, refer here for Update Parameters:
WARNING: --> "sga_target" needs to be increased to at least 596 MB
.
**********************************************************************
Renamed Parameters: [Update Oracle Database 11.2 init.ora or spfile]
**********************************************************************
-- No renamed parameters found. No changes are required.
.
**********************************************************************
Obsolete/Deprecated Parameters: [Update Oracle Database 11.2 init.ora or spfile]
**********************************************************************
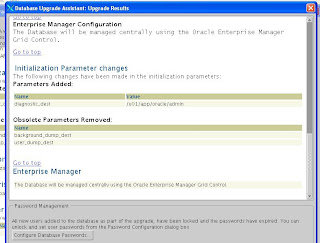
--> background_dump_dest         11.1       DEPRECATED   replaced by  "diagnostic_dest"
--> user_dump_dest               11.1       DEPRECATED   replaced by  "diagnostic_dest"
.

**********************************************************************
Components: [The following database components will be upgraded or installed]
**********************************************************************
--> Oracle Catalog Views         [upgrade]  VALID
--> Oracle Packages and Types    [upgrade]  VALID
--> JServer JAVA Virtual Machine [upgrade]  VALID
--> Oracle XDK for Java          [upgrade]  VALID
--> Oracle Workspace Manager     [upgrade]  VALID
--> OLAP Analytic Workspace      [upgrade]  VALID
--> OLAP Catalog                 [upgrade]  VALID
--> Oracle Text                  [upgrade]  VALID
--> Oracle XML Database          [install]
--> Oracle Java Packages         [upgrade]  VALID
--> Data Mining                  [upgrade]  VALID
--> Expression Filter            [upgrade]  VALID
--> Oracle OLAP API              [upgrade]  VALID
.
**********************************************************************
Miscellaneous Warnings
**********************************************************************
WARNING: --> Database is using a timezone file older than version 14.
.... After the release migration, it is recommended that DBMS_DST package
.... be used to upgrade the 10.2.0.4.0 database timezone version
.... to the latest version which comes with the new release.
WARNING: --> Your recycle bin contains 15 object(s).
.... It is REQUIRED that the recycle bin is empty prior to upgrading
.... your database.  The command:
        PURGE DBA_RECYCLEBIN
.... must be executed immediately prior to executing your upgrade.

Adjust the warnings shown by Pre-Upgrade Information tool.
SQL> PURGE DBA_RECYCLEBIN
SQL> alter system set sga_target = 596M scope=spfile;
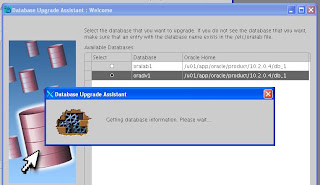
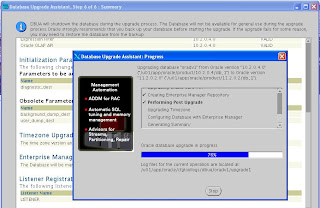
Upgrade using DBUA:
 
<oracle:>:/home/oracle=>cd $ORACLE_HOME
<oracle:>:/u01/app/oracle/product/11.2.0.2/db_1=>cd bin
<oracle:>:/u01/app/oracle/product/11.2.0.2/db_1/bin
/u01/app/oracle/product/11.2.0.2/db_1/bin=>./dbua &
[1]     30616

<oracle:oradv1>:/u01/app/oracle/cfgtoollogs/dbua/oradv1/upgrade1=>sqlplus / as sysdba

SQL*Plus: Release 11.2.0.2.0 Production on Tue Mar 22 23:35:46 2011

Copyright (c) 1982, 2010, Oracle.  All rights reserved.


Connected to:
Oracle Database 11g Enterprise Edition Release 11.2.0.2.0 - 64bit Production
With the Partitioning, Automatic Storage Management, OLAP, Data Mining
and Real Application Testing options

SQL> select owner,object_name,object_type from dba_objects where
  2  status='INVALID';

no rows selected

Upgrade ********** Successful **********


ASE Installation on Linux

This article is intended as a brief guide to install ASE 15.5 on RedHat Enterprise Linux X86_64.


Step1) Crete the sybase user and adduser in sybase group.

#useradd -m -s /bin/ksh -d /home/sybase
#passwd

Step2)Now login with sybase account, down load or copy the ASE software from Sybase website and start as below.
Please see the below screen shots for further installation: